[Inside Vue] 1. Introduction - Vue Code 분석

Vue를 사용하면서, Vue의 코드를 한번 분석해 보고 싶었습니다. Vue를 GitHub에서 받고 코드를 열어 봤지만 어디서부터 봐야 하는지 몰라, 분석하고 싶은 생각을 저리저리~ 뒤로 미루던 차에 코드 분석에 도움이 되는 포스트를 발견하였습니다. 이 포스트를 토대로 Vue 코드를 분석해 나가려고 합니다.
준비물
Vue 소스 코드를 파헤쳐 보기 전에, 2가지 준비물이 있습니다. 모두 당연한 것들이기 때문에 준비하는 것이 전혀 어렵지 않습니다.
Editor
가장 먼저 코드를 살펴볼 수 있도록 editor를 설치하도록 하겠습니다. 저는 VSCode를 사용하였습니다.
VSCode 설치
Source Code
다음으로는 당연히 살펴볼 소스코드가 있어야 하겠죠.

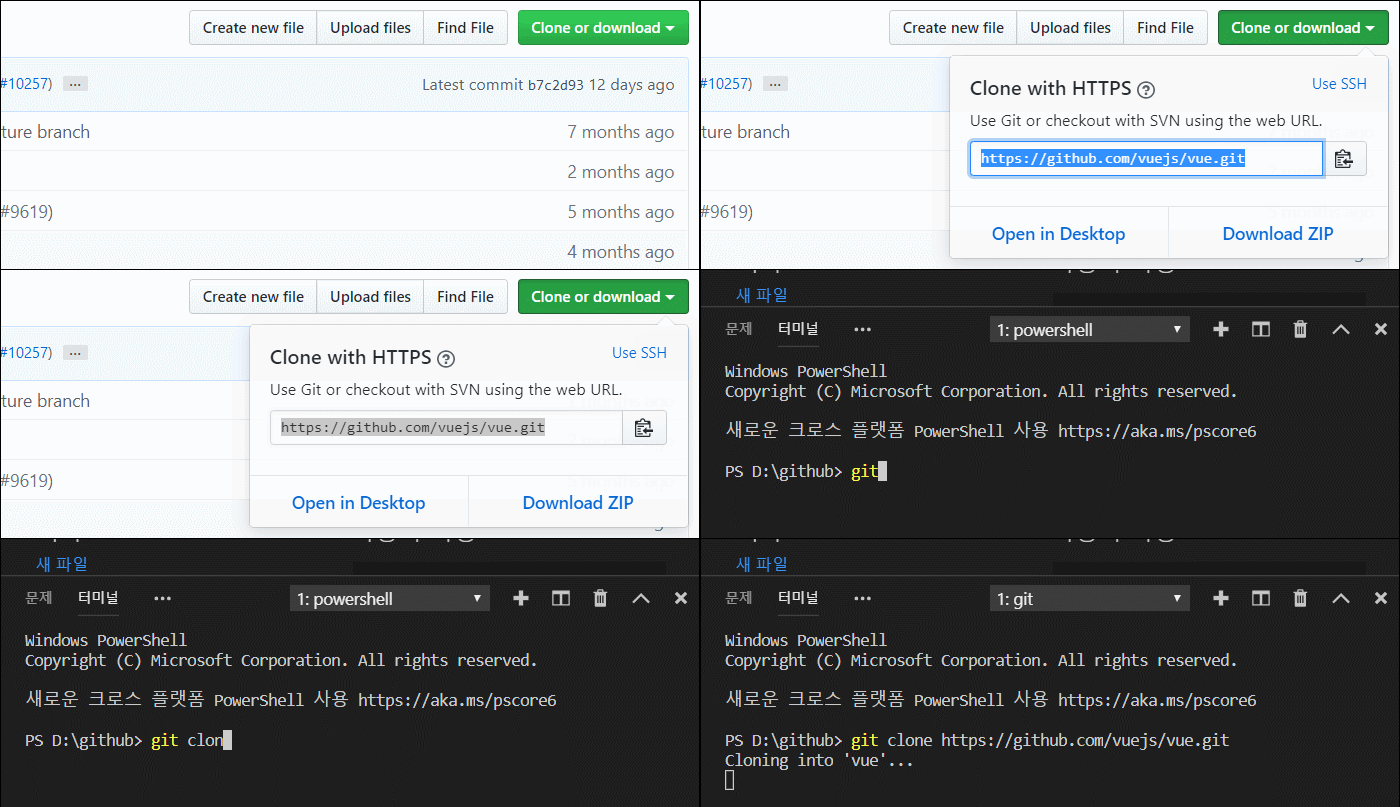
Git을 사용하여 Vue의 GitHub에서 소스 코드를 내려 받도록 하겠습니다. 2.6.10 버전의 vue로 코드 분석을 진행하도록 하겠습니다. 제가 포스팅 하면서 본 Vue 코드는 Fork하여 Vue Repository에 등록하였습니다.
Entry 찾기
어디서 부터 시작하지? 커다란 오픈 소스를 분석 할 때 당연히 떠오르는 질문입니다. Vue는 npm 패키지입니다. Vue는 node.js 환경에서 빌드 되기 때문에 package.json 파일을 열어서 어디서부터 코드 분석을 시작해야 할 지 확인해 보도록 하겠습니다.
package.json 파일
package.json을 열어보면,
{
  "name": "vue",
  "version": "2.6.10",
  "description": "Reactive, component-oriented view layer for modern web interfaces.",
  "main": "dist/vue.runtime.common.js",
  "module": "dist/vue.runtime.esm.js",
  "unpkg": "dist/vue.js",
  "jsdelivr": "dist/vue.js",
  "typings": "types/index.d.ts",
  "files": [
    "src",
    "dist/*.js",
    "types/*.d.ts"
  ],
  "sideEffects": false,
  "scripts": {
    "dev": "rollup -w -c scripts/config.js --environment TARGET:web-full-dev",
    "dev:cjs": "rollup -w -c scripts/config.js --environment TARGET:web-runtime-cjs-dev",
    "dev:esm": "rollup -w -c scripts/config.js --environment TARGET:web-runtime-esm",
    "dev:test": "karma start test/unit/karma.dev.config.js",
    "dev:ssr": "rollup -w -c scripts/config.js --environment TARGET:web-server-renderer",
    ...
- main, module, unpkg, jsdelivr
main, module, unpkg, jsdelivr 옵션에 dist/ 값들이 있는 것을 확인 할 수 있습니다. dist 디렉토리와 하위에 있는 파일들은 빌드을 하면 자동으로 생성되는 파일들입니다. 즉 이 옵션들이 가르키는 값들은 빌드되어 생성된 결과물입니다.
- typings
typings는 TypeScript를 정의한 파일을 나타내는 옵션입니다. Vue 코드는 TypeScript로 작성되어 있기 때문에, TypeScript를 알고 계신다면 더 쉽게 코드를 분석해 나갈 수 있습니다.
types/index.d.ts 파일에 정의된 type들을 볼 수 있습니다.
- files
files 옵션은 npm 옵션 중 하나로, 패키지가 의존성으로 설치될 때 같이 포함될 파일들의 배열입니다. files 옵션에는 3개의 경로들이 지정되어 있습니다. 포함된 경로 중에 src가 있는데, 이 디렉토리에 Vue 코드들이 모여 있습니다.
- sideEffects
sideEffects 옵션은 webpack 옵션 중 하나 입니다. 자세한 설명은 링크를 참고 부탁드립니다.
- scripts
scripts 옵션은 node.js 명령 스크립트를 정의하는 옵션입니다. scripts 옵션의 dev를 살펴 보도록 하겠습니다.
rollup -w -c scripts/config.js --environment TARGET:web-full-dev이렇게 정의 되어 있습니다. scripts/config.js 파일에 web-full-dev를 찾아 보도록 하겠습니다.
scripts/config.js 파일
scripts/config.js 파일에서 web-full-dev를 검색하면,
// Runtime+compiler development build (Browser)
'web-full-dev': {
  entry: resolve('web/entry-runtime-with-compiler.js'),
  dest: resolve('dist/vue.js'),
  format: 'umd',
  env: 'development',
  alias: { he: './entity-decoder' },
  banner
},
위의 코드를 찾을 수 있습니다. 드디어 resolve('web/entry-runtime-with-compiler.js')라는 entry를 찾게 되었습니다. web/entry-runtime-with-compiler.js 파일의 실제 위치를 찾기 위해서는 resolve 함수를 살펴 보아야 합니다.
resolve 함수
const aliases = require('./alias')
const resolve = p => {
  const base = p.split('/')[0]
  if (aliases[base]) {
    return path.resolve(aliases[base], p.slice(base.length + 1))
  } else {
    return path.resolve(__dirname, '../', p)
  }
}
scripts/config.js 파일 상단에서 위의 코드와 같이 resolve 함수를 찾을 수 있습니다. resolve 함수는 path.resolve 결과 값을 리턴합니다. resolve 함수는 web/entry-runtime-with-compiler.js를 전달 받으면,
p는web/entry-runtime-with-compiler.js가 됩니다.base에는web이 저장됩니다.path.resolve에aliaes[base]와entry-runtime-with-compiler.js가 전달됩니다.
이제 aliaes[base]의 값을 살펴보기 위해 aliaes 객체를 살펴보도록 하겠습니다.
aliaes 객체
aliaes 객체는 scripts/alias에 있습니다.
const path = require('path')

const resolve = p => path.resolve(__dirname, '../', p)

module.exports = {
  vue: resolve('src/platforms/web/entry-runtime-with-compiler'),
  compiler: resolve('src/compiler'),
  core: resolve('src/core'),
  shared: resolve('src/shared'),
  web: resolve('src/platforms/web'),
  weex: resolve('src/platforms/weex'),
  server: resolve('src/server'),
  sfc: resolve('src/sfc')
}aliaes는 위의 코드와 같은 객체입니다. aliaes['web']은 resolve('src/platforms/web')가 됩니다.
src/platforms/web/entry-runtime-with-compiler.js 파일
위의 내용과 같이 코드를 분석한 결과 web/entry-runtime-with-compiler.js의 실제 위치는 src/platforms/web/entry-runtime-with-compiler.js 입니다.
/* @flow */

import config from 'core/config'
import { warn, cached } from 'core/util/index'
import { mark, measure } from 'core/util/perf'

import Vue from './runtime/index'
import { query } from './util/index'
import { compileToFunctions } from './compiler/index'
import { shouldDecodeNewlines, shouldDecodeNewlinesForHref } from './util/compat'

const idToTemplate = cached(id => {
  const el = query(id)
  return el && el.innerHTML
})

const mount = Vue.prototype.$mount
Vue.prototype.$mount = function (
  el?: string | Element,
  hydrating?: boolean
): Component {
  ...
  const options = this.$options
  // resolve template/el and convert to render function
  if (!options.render) {
    let template = options.template
    if (template) {
      if (typeof template === 'string') {
        if (template.charAt(0) === '#') {
          template = idToTemplate(template)
          ...
        }
      } else if (template.nodeType) {
        template = template.innerHTML
      } else {
        ...
      }
    } else if (el) {
      template = getOuterHTML(el)
    }
    ...
  }
  return mount.call(this, el, hydrating)
}

/**
 * Get outerHTML of elements, taking care
 * of SVG elements in IE as well.
 */
function getOuterHTML (el: Element): string {
  if (el.outerHTML) {
    return el.outerHTML
  } else {
    const container = document.createElement('div')
    container.appendChild(el.cloneNode(true))
    return container.innerHTML
  }
}

Vue.compile = compileToFunctions

export default Vueentry-runtime-with-compiler.js의 첫번 째 줄에 정의 된 /* @flow */는 type checker 입니다. flow는 package.json에서 살펴 본 typings의 타입들을 체크 하는 역할을 합니다.
entry-runtime-with-compiler.js가 수행하는 일들은 아래와 같습니다,
config를 import 합니다.- 유틸 함수들을 import 합니다.
Vue를 import 합니다.idToTemplate를 정의합니다.getOuterHTML를 정의합니다.idTotemplate와getOuterHTML를 사용하여Vue.prototype.$mount를 정의합니다.Vue.compile를 정의합니다
2가지 내용을 집중해야 합니다.
- 이 코드는 Vue 코어 코드가 아닙니다.
entry-runtime-with-compiler.js이라는 파일 이름에서 알 수 있듯이 단순 entry 역할(코어 코드를 감싸는 역할)을 할 뿐입니다. 코어 코드는 다음 포스트에서 자세히 이야기 하도록 하겠습니다. $mount를 따로 저장하고, 새로운$mount를 정의하여 몇가지 검증을 한 후 저장한$mount를 호출합니다.(캡슐화하는 부분입니다.) 즉, 실제$mount를 호출하기 전에 몇가지 검증을 추가하는 코드입니다.
요약
package.json의scripts의dev의 값인rollup -w -c scripts/config.js --environment TARGET:web-full-dev를 시작으로 코드 리딩을 시작합니다.scripts/config.js파일을 거쳐src/platforms/web/entry-runtime-with-compiler.js파일에 도착하였습니다.
src/platforms/web/entry-runtime-with-compiler.js는 Vue 코어 코드가 아닌 entry 역할만 하는 코드입니다.
다음으로 볼 것
다음 포스트(2. Initialize - Vue 코어 함수)에서는 Vue 코어 함수를 찾을 것입니다. src/platforms/web/entry-runtime-with-compiler.js 파일에 정의 된 import Vue from './runtime/index'을 실마리로 src/platforms/web/runtime/index.js 파일을 시작으로 코드를 따라 갈 것입니다.