[Inside Vue] 6. Reactive - Watcher가 업데이트 하는 3가지 방법(Lazy, Sync, Queue)

이전 포스트(5. Reactive - Observer, Dep and Watcher)에서는 Observer와 Dep, Watcher의 관계에 대해 이야기하였습니다. 이번 포스트에서는 Watcher가 어떻게 값을 업데이트 하는지, View와 data의 업데이트 순서가 어떻게 결정되는지에 대해 야야기 하도록 하겠습니다.
Watcher가 업데이트 하는 3가지 방법
export function defineReactive (
  obj: Object,
  key: string,
  val: any,
  customSetter?: ?Function,
  shallow?: boolean
) {
  ...

  let childOb = !shallow && observe(val)
  Object.defineProperty(obj, key, {
    enumerable: true,
    configurable: true,
    get: function reactiveGetter () {
      ...
    },
    set: function reactiveSetter (newVal) {
      ...
      dep.notify()
    }
  })
}
위의 코드를 보면, 반응형 프로퍼티가 업데이트 되면 setter 함수에서 dep.notify()를 호출합니다.
export default class Dep {
  ...

  notify () {
    ...
    for (let i = 0, l = subs.length; i < l; i++) {
      subs[i].update()
    }
  }
}
Dep 클래스의 notify 함수는 subs[i].update()(Watcher 클래스에 update 함수가 정의되어 있습니다)를 호출합니다.
/**
 * Subscriber interface.
 * Will be called when a dependency changes.
 */
update () {
  /* istanbul ignore else */
  if (this.lazy) {
    this.dirty = true
  } else if (this.sync) {
    this.run()
  } else {
    queueWatcher(this)
  }
}
update 함수를 살펴보면, lazy, sync, queue, 3가지 방식으로 업데이트하는 것을 볼 수 있습니다.
Lazy
lazy 옵션은 Watcher 인스턴스를 생성할 때 파라미터로 전달됩니다. this.lazy가 true일 경우, this.dirty가 true가 됩니다.(변수명을 해석하면.. 게으르면 더럽습니다. 가 되네요) dirty가 사용되는 코드를 보면,
/**
 * Evaluate the value of the watcher.
 * This only gets called for lazy watchers.
 */
evaluate () {
  this.value = this.get()
  this.dirty = false
}
Watcher 클래스의 evaluate 함수에서 사용됩니다. evaluate 함수는 this.get()를 호출하고 리턴 값을 this.value에 저장한 후 this.dirty를 false로 만들어 줍니다.
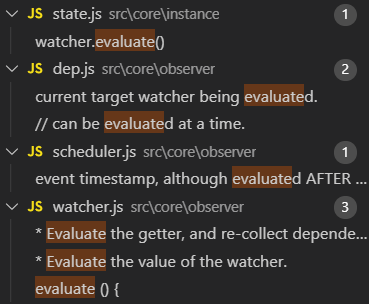
이제 evaluate 함수를 사용하는 곳을 전체 프로젝트에서 찾아 봅시다.

core 디렉토리 밑에서 src/core/instance/state.js 파일에서 evaluate 함수를 사용하는 것을 볼 수 있습니다.
src/core/instance/state.js 파일은 3. Initialize - Mixin Layer와 4. Initialize - _init 함수에서 살펴보았던 파일입니다.
evaluate 함수는 src/core/instance/state.js 파일의 createComputedGetter 함수에서 사용 됩니다.
function createComputedGetter (key) {
  return function computedGetter () {
    const watcher = this._computedWatchers && this._computedWatchers[key]
    if (watcher) {
      if (watcher.dirty) {
        watcher.evaluate()
      }
      if (Dep.target) {
        watcher.depend()
      }
      return watcher.value
    }
  }
}
함수 이름에서 알 수 있듯이 computed 프로퍼티의 getter 함수를 생성하는 함수입니다. computedGetter 함수가 호출되면, watcher.dirty가 true 일 경우 watcher.evaluate()를 호출합니다. lazy 모드일 경우 실제로 값이 필요할 때까지 평가(evaluate)를 미룰 수 있습니다.
Sync
update 함수를 보면, this.sync가 true일 경우(기본값은 false입니다), this.run()을 실행합니다.
/**
 * Scheduler job interface.
 * Will be called by the scheduler.
 */
run () {
  if (this.active) {
    const value = this.get()
    if (
      value !== this.value ||
      // Deep watchers and watchers on Object/Arrays should fire even
      // when the value is the same, because the value may
      // have mutated.
      isObject(value) ||
      this.deep
    ) {
      // set new value
      const oldValue = this.value
      this.value = value
      if (this.user) {
        try {
          this.cb.call(this.vm, value, oldValue)
        } catch (e) {
          handleError(e, this.vm, `callback for watcher "${this.expression}"`)
        }
      } else {
        this.cb.call(this.vm, value, oldValue)
      }
    }
  }
}
run 함수는 this.get()(get 함수는 5. Reactive - Observer, Dep and Watcher에서 살펴보았습니다.)을 호출합니다. value의 값이 변경 되었거나, value가 object이거나, this.deep이 true일 경우 value와 oldValue를 세팅한 후 콜백함수(this.cb.call(this.vm, value, oldValue))를 실행합니다.
Queue
lazy, sync 모드가 아닐 경우, queue 모드로 동작합니다. queue 모드에서 update 함수에서 queueWatcher(this)를 실행합니다.
/**
 * Push a watcher into the watcher queue.
 * Jobs with duplicate IDs will be skipped unless it's
 * pushed when the queue is being flushed.
 */
export function queueWatcher (watcher: Watcher) {
  const id = watcher.id
  if (has[id] == null) {
    has[id] = true
    if (!flushing) {
      queue.push(watcher)
    } else {
      // if already flushing, splice the watcher based on its id
      // if already past its id, it will be run next immediately.
      let i = queue.length - 1
      while (i > index && queue[i].id > watcher.id) {
        i--
      }
      queue.splice(i + 1, 0, watcher)
    }
    // queue the flush
    if (!waiting) {
      waiting = true

      if (process.env.NODE_ENV !== 'production' && !config.async) {
        flushSchedulerQueue()
        return
      }
      nextTick(flushSchedulerQueue)
    }
  }
}flushing이 false일 경우, 간단한 push 메소드를 호출합니다. flushing이 true일 경우 watcher.id의 바로 오른쪽에 splice를 이용하여 삽입 됩니다. 이렇게 하여, 바로 다음에 호출되도록 합니다. (queue가 flush 되고 있다는 것은 queue안에 있는 watcher들이 동작하고 있는 상태라고 이해 할 수 있을 것 같습니다.)
마지막으로 waiting이 false일 때, nextTick에 flushSchedulerQueue를 호출합니다.
Vue를 사용하면서 nextTick이라는 함수를 보셨을 것입니다. Vue는 매 Tick 마다 view의 변경 사항을 DOM에 그립니다. nextTick 함수는 다음 tick에 파라미터로 넘겨준 콜백함수를 호출됩니다.
queueWatcher 함수를 보면 2개의 flag(flushing, waiting)를 사용하는 것을 볼 수 있습니다. 2개의 flag를 사용하는 이유는, nextTick 함수로 인해 flushSchedulerQueue 함수가 즉시 실행 되지 않고 다음 tick에 실행되게 됩니다. 한 tick에 queueWatcher 함수가 여러번 호출되면, 다음 tick에 동시에 flushSchedulerQueue가 여러번 호출됩니다. 한번의 tick에 한번의 flushSchedulerQueue를 호출하기 위해 waiting flag를 사용합니다.
즉, flushing flag는 queue에 있는 watcher가 동작하고 있는 것을 나타내는 flag이고, waiting flag를 한번의 tick에 한번의 flushSchedulerQueue를 호출하기 위해 사용됩니다.
View 업데이트를 트리거하는 방법
watcher가 value를 업데이트 하는 것을 살펴 보았습니다. 이제까지 살펴본 watcher는 computed 프로퍼티와 watch의 콜백함수를 호출하는데 사용되었습니다.
view를 업데이트 하는데 watcher가 사용될 것 같은데, 지금까지 살펴본 코드 어디에서도 view를 업데이트 하는 부분이 등장하지 않았습니다. view를 업데이트 하는 코드를 찾을 수 있는 단서는 3. Initialize - Mixin Layer에서 살펴본 _update 함수입니다. _update 함수는 DOM을 업데이트하는 역할을 합니다. _update를 프로젝트 전체 검색으로 어디서 사용되는지 찾아보도록 하겠습니다.

src/core/instance/lifecycle.js 파일에서 vm._update으로 _update 함수를 호출하는 것을 볼 수 있습니다. mountComponent 함수에서 vm._update(vnode, hydrating)와 vm._update(vm._render(), hydrating)를 호출합니다. mountComponent 함수(mountComponent 함수는 $mount의 코어 함수 입니다)는 9. View Render - Patch에서 자세히 살펴 볼 것이기 때문에 지금은 간단히 살펴보도록 하겠습니다.
export function mountComponent (
  vm: Component,
  el: ?Element,
  hydrating?: boolean
): Component {
  ...

  let updateComponent
  /* istanbul ignore if */
  if (process.env.NODE_ENV !== 'production' && config.performance && mark) {
    updateComponent = () => {
      ...
      vm._update(vnode, hydrating)
      ...
    }
  } else {
    updateComponent = () => {
      vm._update(vm._render(), hydrating)
    }
  }

  // we set this to vm._watcher inside the watcher's constructor
  // since the watcher's initial patch may call $forceUpdate (e.g. inside child
  // component's mounted hook), which relies on vm._watcher being already defined
  new Watcher(vm, updateComponent, noop, {
    before () {
      if (vm._isMounted && !vm._isDestroyed) {
        callHook(vm, 'beforeUpdate')
      }
    }
  }, true /* isRenderWatcher */)
  hydrating = false

  ...
}
new Watcher(...)를 찾아냈습니다. lazy의 기본 값은 false이기 때문에 생성자 함수에서 get 함수가 호출되고, Dep와 Watcher, Observer 간의 관계가 만들어 집니다. (5. Reactive - Observer, Dep and Watcher 참고)
updateComponent 함수가 watcher의 getter 함수로 전달됩니다. watcher는 getter 함수로 전달된 updateComponent 함수를 실행하여 view가 업데이트됩니다.
반응형으로 view를 업데이트 하는 방법은 initRender 함수에서 호출하는 defineReactive가 핵심입니다.
export function initRender (vm: Component) {
  ...

  /* istanbul ignore else */
  if (process.env.NODE_ENV !== 'production') {
    defineReactive(vm, '$attrs', parentData && parentData.attrs || emptyObject, () => {
      !isUpdatingChildComponent && warn(`$attrs is readonly.`, vm)
    }, true)
    defineReactive(vm, '$listeners', options._parentListeners || emptyObject, () => {
      !isUpdatingChildComponent && warn(`$listeners is readonly.`, vm)
    }, true)
  } else {
    defineReactive(vm, '$attrs', parentData && parentData.attrs || emptyObject, null, true)
    defineReactive(vm, '$listeners', options._parentListeners || emptyObject, null, true)
  }
}
위의 코드를 보면 $attrs와 $listeners이 변경 되었을 때 view가 업데이트 됩니다.
업데이트 순서를 정하는 방법
<div id="app">
  {{ newName }}
</div>

<script>
var app = new Vue({
  el: '#app',
  data: {
    name: 'foo'
  },
  computed: {
    newName () {
      return this.name + 'new!'
    }
  }
})
</script>
위의 코드를 살펴보면, 하나의 data 프로퍼티(name), 하나의 computed 프로퍼티(newName)이 있고, computed 프로퍼티를 view에 나타내는 예제입니다.
위의 코드가 초기화 되면, 하나의 반응형 프로퍼티(data)와 그것을 구독(subscribe)하는 2개의 watcher(computed, view)가 생성됩니다. (computed 프로퍼티는 반응형 프로퍼티가 아닌 watcher이기 때문에 view는 data 프로퍼티를 구독합니다.)
name이 변경되면, computed 프로퍼티와 view가 모두 업데이트 되어야 합니다. 여기서 업데이트 순서가 중요한데, view를 업데이트 하고 computed 프로퍼티를 업데이트 하는 순서라면 view는 이전의 computed 프로퍼티의 값을 그리게 됩니다.
name이 변경되면, dep.notify()가 호출되고, notify 함수는 watcher의 update()를 호출하여 값을 업데이트 합니다. lazy와 sync의 기본 값은 모두 false이기 때문에 queueWatcher(this)가 호출 되고, 마지막으로 nextTick(flushSchedulerQueue)가 호출됩니다. 업데이트 순서를 살펴보기 위해 flushSchedulerQueue를 살펴보도록 하겠습니다.
/**
 * Flush both queues and run the watchers.
 */
function flushSchedulerQueue () {
  ...

  // Sort queue before flush.
  // This ensures that:
  // 1. Components are updated from parent to child. (because parent is always
  //    created before the child)
  // 2. A component's user watchers are run before its render watcher (because
  //    user watchers are created before the render watcher)
  // 3. If a component is destroyed during a parent component's watcher run,
  //    its watchers can be skipped.
  queue.sort((a, b) => a.id - b.id)

  ...
}
queue를 id 순서로 정렬됩니다. 즉, id 값이 작을 수록 먼저 업데이트 됩니다. 4. Initialize - _init 함수에서 살펴보았던 _init 함수를 다시 살펴보면,
Vue.prototype._init = function (options?: Object) {
  ...
  // expose real self
  vm._self = vm
  initLifecycle(vm)
  initEvents(vm)
  initRender(vm)
  callHook(vm, 'beforeCreate')
  initInjections(vm) // resolve injections before data/props
  initState(vm)
  initProvide(vm) // resolve provide after data/props
  callHook(vm, 'created')

  ...

  if (vm.$options.el) {
    vm.$mount(vm.$options.el)
  }
}vm.$mount(vm.$options.el)가 가장 마지막에 호출되는 것을 볼 수 있습니다. $mount 함수는 mountComponent(3. Initialize - Mixin Layer에서 이야기 했습니다.)를 호출하는데 mountComponent 함수는 Watcher 인스턴스를 생성합니다. 가장 마지막에 호출되기 때문에 가장 큰 id를 할당 받아 가장 마지막에 view가 업데이트 되게 됩니다.
요약
이번 포스트에서는 Watcher가 업데이트하는 lazy, sync, queue 3가지 방법에 대해 이야기 했습니다. 기본값은 queue 모드입니다.
- lazy 모드는 값이 실제로 필요할 때까지 Watcher의 평가를 미루는 모드입니다.
- sync 모드는 바로 Watcher가 평가하게 되는 모드입니다.
- queue 모드는 한 tick 동안 Watcher가 평가해야 하는 목록을 queue에 저장하였다가 다음 tick에서 평가를 하는 모드입니다.
view를 업데이트 할 때도, watcher를 재사용합니다. 모든 값이 업데이트 되고 가장 마지막에 view가 업데이트 되는데 그 이유는 _init 함수에서 $mount 함수가 가장 마지막에 호출되었기 때문입니다.
다음으로 볼 것
다음 포스트에서는 브라우저에서 실행 되는 코드로 변환해 주는 컴파일러 함수를 찾아 보고(7. View Render - 컴파일러) 어떤 과정으로 만들어지는지 살펴 보도록 하겠습니다.